How to set up three-point lighting for a home studio begins with a simple idea: control the direction, softness, and intensity of light. The standard arrangement uses a key light, fill light, and backlight. Together, they shape the face, separate the subject from the background, and create a more natural image. Cinematographer Roger Deakins has said, “Lighting is not about making things look pretty; it’s about creating an atmosphere.” That principle matters even in a small bedroom studio.
Place the key light about 45 degrees from your face and slightly above eye level. A softbox near a window can produce gentle shadows across your cheek. Put the fill light on the opposite side, using lower brightness. If you have no second lamp, try a white foam board. It reflects light without adding harsh glare. Position the backlight behind you, aimed toward your shoulders or hair. Keep it subtle. Too much brightness can create a distracting halo.
Check the result through your camera, not only with your eyes. Camera screens can hide uneven skin tones and strong shadows. I have found that beginners often place every light too close, making the face look flat and overexposed. That mistake is easy to repeat. Move one light at a time. Record a short test clip. Then adjust brightness, distance, and color temperature. Your first setup may not look perfect. That is useful. It shows what needs reconsideration before a real recording begins.
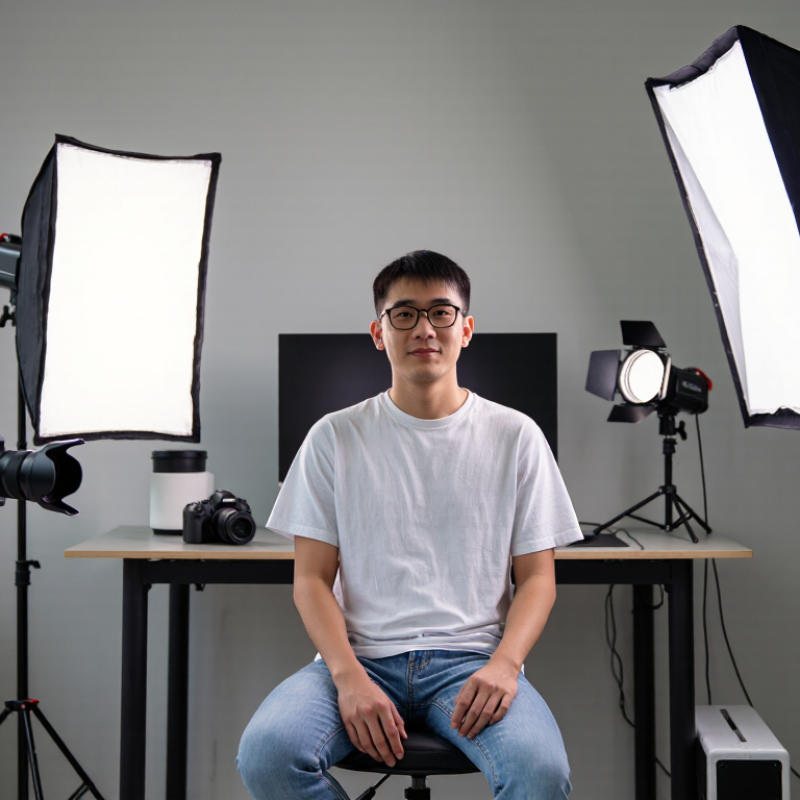
Understand the Roles of Key, Fill, and Back Lights
In a home studio, the key light does most of the work. Place it slightly above eye level and off to one side of the camera. A soft source near a window can create gentle shadows across the face. Watch the nose shadow: if it stretches too far, move the light closer to the camera. Small adjustments matter.
The fill light controls how dark those shadows appear. Set it opposite the key, then use lower brightness. A white board can bounce light back onto the shadowed cheek without adding another lamp. Keep some contrast; completely flat lighting can make a face look less natural. I sometimes set the fill too strong on the first try. Check the image, then dial it down.
The back light separates the subject from the background. Place it behind and slightly to one side, aimed at the hair or shoulders—not into the lens. A faint edge of light is usually enough. In a small room, this light may spill onto a wall or create an odd bright patch. Move it, flag it with cardboard, or leave it off. Three lights are a starting point, not a rule.
How to Set Up Three-Point Lighting for a Home Studio
Understand the roles of key, fill, and back lights with this example starting level for relative light output.
Reading the chart: Set the key light as the reference at 100%. A fill light at 50% gives a gentle 2:1 key-to-fill starting ratio, while a back light at 75% helps separate the subject from the background. Adjust for your room, subject, and desired look.
Position the Key Light to Shape the Subject
Position the key light about 30 to 45 degrees from the camera, then raise it slightly above the subject’s eye line. This angle creates gentle shadow beneath the cheekbone and jaw. Start with the light roughly an arm’s length away. A larger light source placed close usually softens shadows, while moving it farther back can make the face look more contrasty. Watch the background, too. A nearby wall may catch unwanted spill.
Turn the subject’s face a little toward the light, then check both eyes on the monitor. One should have a small, natural catchlight. If the nose shadow reaches the lip, raise or shift the light slightly. Small adjustments matter. For color consistency, consult the Illuminating Engineering Society’s TM-30-20 method: it scores color fidelity (Rf) from 0 to 100 and reports gamut relative to a reference value of 100. Compare these figures across lights when accurate skin tones matter; the numbers do not guarantee flattering light. A common mistake is chasing brightness before shaping shadows. I still find that easy to do. Dim the source or adjust its distance, then reassess the face rather than the room.
How to Set Up Three Point Lighting for a Home Studio? - Position the Key Light to Shape the Subject
| Setup Dimension |
Practical Starting Point |
What to Check |
| Horizontal position |
Place the key light about 30–45° to one side of the camera. |
The light should shape the face with a gentle shadow, rather than flattening it from directly beside the camera. |
| Height and downward angle |
Raise the light slightly above eye level and aim it down toward the subject, roughly 15–45°. |
Look for natural-looking shadows under the nose and chin. If the eye sockets become too dark, lower the light or reduce its downward angle. |
| Distance from subject |
Start about 0.6–1.2 m (2–4 ft) away, adjusting for the size of the light source and available space. |
Moving a light closer makes it appear larger and can create softer light; moving it farther away generally makes its illumination less intense at the subject. |
| Light softness |
Use a diffuser or a large, diffused source positioned close to the subject. |
Soft shadows and gradual transitions usually suit portraits and video calls. Keep diffusion clear of hot fixtures and follow the light’s safety instructions. |
| Direction and face shape |
Begin on the side of the face turned slightly toward the camera, then adjust the angle in small increments. |
Check both eyes for visible catchlights and make sure the shadow side retains detail. |
| Brightness |
Set exposure with the key light first; add fill or a reflector only if the shadow side needs more detail. |
Avoid clipped highlights on the forehead or cheeks. If using fill, keep it dimmer than the key to preserve visible facial shape. |
| Background spill |
Angle the key toward the subject and, where practical, keep the subject several feet from the background. |
Check that the background is not unintentionally brighter than the subject and that the key does not create distracting shadows behind them. |
| Final adjustment |
Change one factor at a time: position, height, distance, or brightness. |
Review a camera preview at the intended framing, since shadows and highlights can look different in the recorded image. |
These are starting guidelines; adjust the setup for the subject, room, camera framing, and desired look.
Add Fill and Back Lights to Balance the Scene
Once the key light is in place, add fill near the camera to soften hard shadows. Start with a 2:1 key-to-fill reading, measured at the subject’s face. This is a practical starting point, not a fixed rule. A white card can work when space or budget is tight. Keep it subtle. If both sides of the face look equally bright, reduce the fill or move it farther away.
Place the back light behind the subject, slightly above shoulder level. Aim for a narrow rim on hair or shoulders, not a bright stripe across the wall. The Illuminating Engineering Society’s Lighting Handbook, 10th edition, describes the inverse-square relationship: doubling a point source’s distance reduces illuminance to about one quarter. Softboxes do not behave like perfect point sources at close range, but the principle helps explain why small distance changes matter. Check your frame after each adjustment; a faint spill on the background can be hard to notice until recording. I sometimes prefer a slightly uneven edge. It can look natural, though it deserves a careful check.
Test and Adjust the Lighting for a Natural Look
Place the key light slightly above eye level and about 45 degrees to one side. Soften it with diffusion, then bring the fill light up until facial shadows remain visible but gentle. Add a backlight only if it separates hair or shoulders from the background; too much can look theatrical. Keep the subject a little away from the wall to soften the shadow behind them.
Now test, don’t guess. Record a short clip and check skin tone, under-eye shadows, and the wall’s color. Adjust one light at a time, moving it before increasing its brightness. Mixed window light and warm bulbs can shift skin color, so switch off competing sources when possible. The European Broadcasting Union’s Tech 3355 report uses a 0–100 TLCI scale; scores from 85 to 100 generally indicate little or no color correction is needed. A high score helps, but your camera and room still matter. My own setup can look balanced on the monitor and slightly flat in the recording. Annoying, but useful to catch.
Tips: Lock white balance, then check a test clip on a second screen. If the face looks waxy, reduce fill or soften the key. A small mismatch is sometimes more natural than perfectly even light.
Conclusion
Learn how to set up three-point lighting for a home studio by understanding the purpose of each light. The key light is the main source and shapes the subject’s face or form, while the fill light softens harsh shadows created by the key. The back light separates the subject from the background and adds depth to the image. Before positioning the lights, choose suitable equipment and organize the studio space so there is enough room to work safely and comfortably.
Begin by placing the key light at an angle slightly above and to one side of the subject. Adjust its distance and height to create flattering highlights and shadows. Add the fill light on the opposite side at a lower intensity, then position the back light behind the subject to create a subtle outline. Test the setup through the camera, adjust brightness and angles, and aim for balanced illumination that looks natural rather than overly dramatic.

 Gravity Light